Posts

22. Further proof that I can probably do this

Image
After looking through the proposal prospectus document, I realise that there are other skills involved with the artefact that I have not demonstrated in post #21. Because of this, I've decided to list through the other skills needed that I have, that are needed for this project. Audio equipment/mixing:  I've produced different types of audio recordings to fulfill a brief for Level 4. The recordings can be found in the link below. https://soundcloud.com/amelia-liw/sets/project-1 For the level 4 Visions & Wonders module, I've also had to create my own track from a variety of midi tracks, and have a decent competency in FL studio (the interface is still confusing as hell but I can work with it). This second playlist has progressions of track used for the final project. Looking back it sounds unrefined, but which designer likes what they made in the past? https://soundcloud.com/amelia-liw/sets/v-w Sculpting:  As shown in my personal project the Mimic Treasure Ch

21. Video Documentation of Working Prototype

The working prototype is basically a combination of the two Arduino technical tutorials, to show the basic function of my final artefact. I couldn't use the red pressy button in the video because the pins don't fit on a breadboard and I don't have access to a soldering iron. It does work when I press the correct pins and then smoosh the button onto the table, but it leaves me without a free hand to take a video. The video basically shows that I can use different inputs to play different tracks. The final types of input I use might be different - either all touch sensors, or I'll see what kinds of controllers I can find which can match up with the artefact. I might also use conductive paint or foil strips, depending on cost and accessibility. Code:  #include <CytronEZMP3.h> CytronEZMP3 mp3; int touch = 5;                int buttonPin = 6; int ledPin = 4; void setup(){   Serial.begin(9600);   if(!mp3.begin(2, 3))   {     Serial.println("Init

20. Gantt Chart + Time Management Plan

Image
While working on the Gantt chart, I tried to include a week of extra buffer at the end just in case things don't go as planned. I also vaguely remember Ian mentioning that some facilities and labs around the study break period in April, so I tried to plan around that as well. If you're having trouble ready the Gantt chart here, I'll also include it in my project prospectus, or you can right click on the image, copy image address, and open the image only in a new tab. January - February March April - May

19. Compiled Visual References + Branding

Image
The mood board is built from existing visual assets, but just compiled here for easy reference. The title font is called Luna, and the body font is Raleway. 

18. Project Technical Equipment and Outcomes

Image
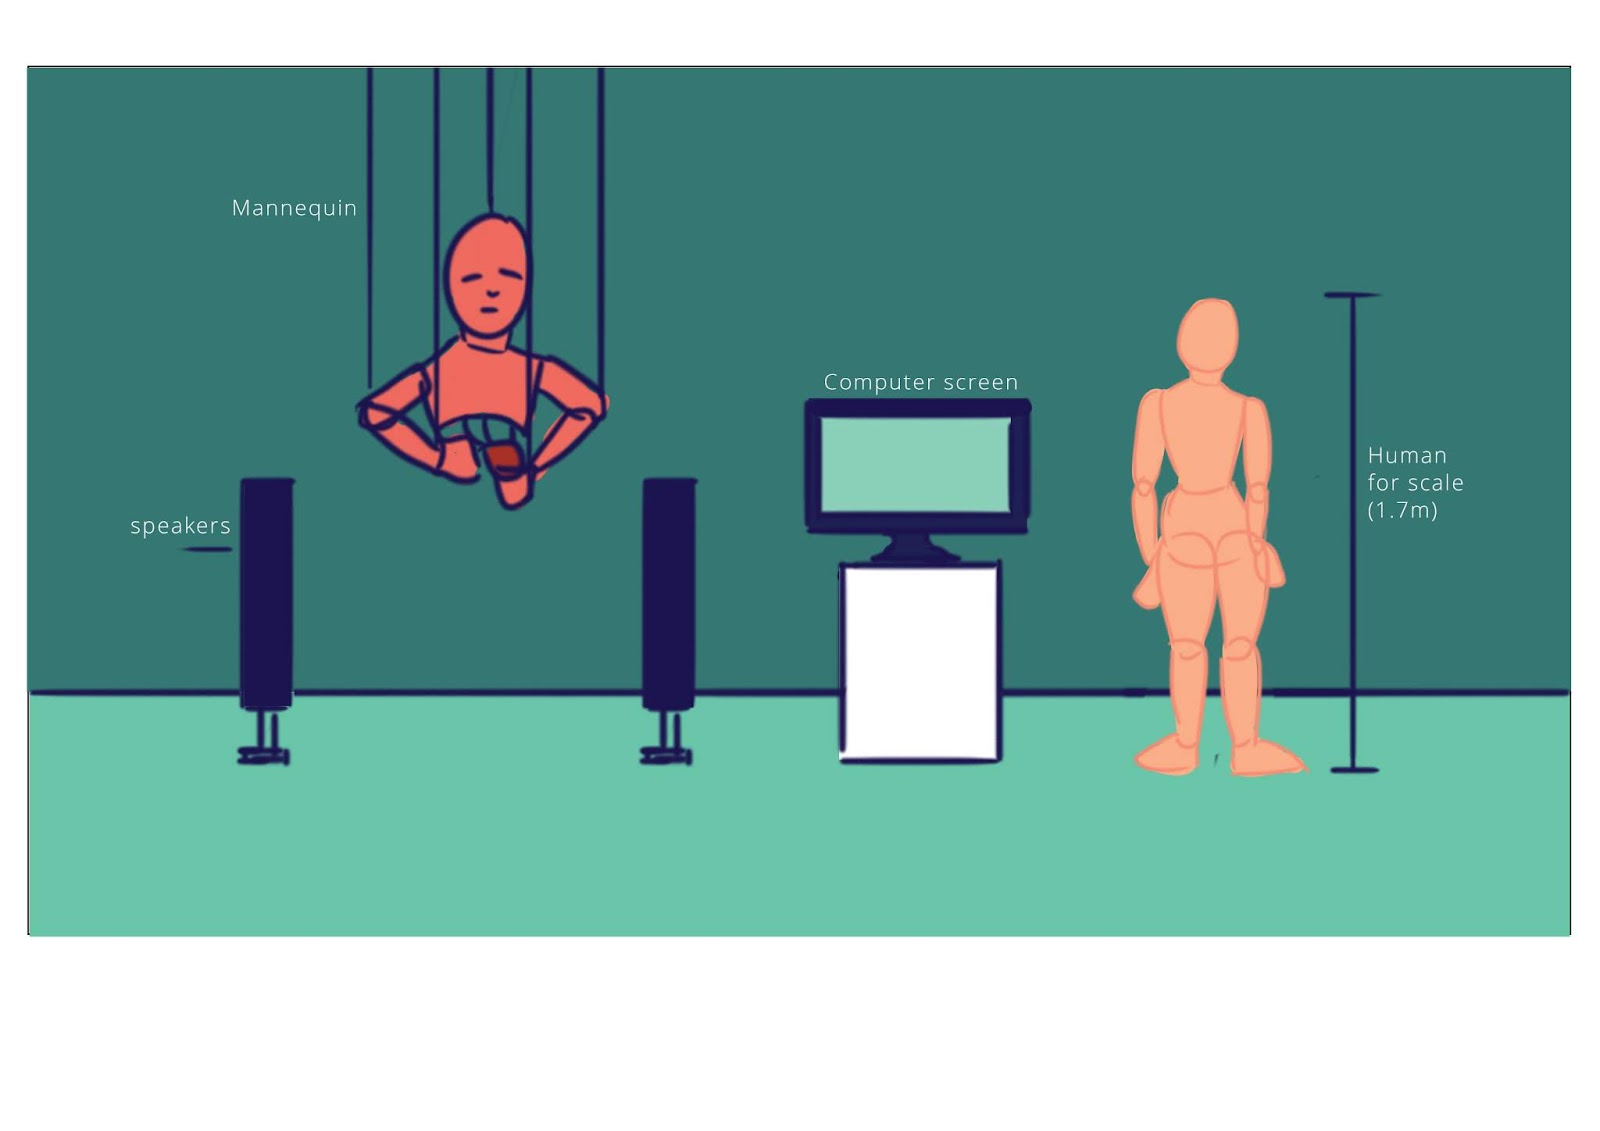
Things I'll need basically Software Arduino IDE  - to edit and load code onto the Arduino Uno Adobe Photoshop - Creating assets Adobe Illustrator  - Creating assets (will probably use this more) Unity  - Making the interface Adobe Audition - editing audio files FL studio  - creating audio loops Hardware  Arduino Uno - it's the brain! Easy MP3 Shield - helps play the required audio files Wires - connections  Buttons - or rather, whatever sensors I end up using CPU  - powers the screen/interface Monitor  - the screen, for people to see things Power tools  - cut cut drill drill sand sand Sculpting equipment  - to make the sculpted heart Project Outcomes This artefact will be a physical installation. The torso of a mannequin will be suspended from the ceiling, with its electronic guts hanging out and holding a heart in its hands. The heart will be the controller of the installation, and the main thing that users i

17. Material Research #2 Conductive Thread, Paint, and Tape

Image
This blog post is mainly research into what kinds of materials I can use in my "heart". Since I aim to make it at least semi-translucent, wires might show through and won't look very nice or realistic underneath the silicone "flesh". The first material we're looking at is Conductive Thread.  Suggested by Julian, Conductive thread is basically thread that can conduct electricity. Sparkfun sells two varieties - Silver (coated) and Stainless Steel. The Silver type is coated over nylon thread. This makes it incompatible with solder, since the nylon core will melt. The Stainless Steel type is apparently harder to work with, but is compatible with solder. If I use conductive thread, I will need to be careful of points where the thread might touch since they are uncoated. It does impart a cool shiny look onto the inside of the heart, which might be visually appealing. Since I won't need my material to have a high tensile strength as I'm not sewing it o

16. Material Research #1 Sculpting, Silicone Mould Making, Resin Casting

Image
I initially wanted to caption this as a technical tutorial, but decided to file it under "Material research" in the end since I don't have the materials to try it out myself. At the very least, it's a look into the methods, and understanding that what I want to make is achievable. For the heart, Julian had mentioned the possibility of making a mould directly from an animal's heart. However, after asking around in 3D Lab 1, I can see how there might be concerns of hygiene, and also trouble creating something of a custom size. Due to that, I decided to go sculpting the heart instead, in different parts, and then combine them.  This first video is a pretty comprehensive look into sculpting, making a mould out of the master, and then filling that mould with resin. For my purposes my final product needs to be silicone rather than resin, so I'll need to look into that. However, the video shows how to tape together a silicone mould properly when filling it